| Home | Services | About Us | Reference Area | ||||||||
Hyper-V Server 2008 R2 SP1 on Intel SATA Server |
||||||||
|
Primary Goal: steps for creating a free Hyper-V environment (for hosting Microsoft Small For our small business customers tight on funds and with relatively light server needs, we feel a server using SATA drives is a cost effective solution. Considering the cost of 500GB and 1TB drives, ordering 3 drives for a RAID1 + HotSpare configuration is quite economical with reasonably decent performance. The motherboard we choose was the SuperMicro X8SIL-F which utilizes the Intel 3420 chipset with built-in RAID support. Most of our customers are a good fit for the Microsoft Windows Small Business Server (SBS) 2008/2011 Standard Edition Operating System. We decided the many benefits of running SBS in a virtual machine warranted testing a SBS install in a (free) Hyper-V Server 2008 R2 Virtual Machine (VM). <BeginRant> It is very frustrating that Microsoft won't allow a free host install of Server 2008 R2 (with just Hyper-V Role) with the SBS 2008/2011 Standard OS! Being able to manage a host server from the GUI would make so much more sense for the small business!<EndRant> But I am certainly not the first to lament this issue. Overview: Setting up the administrative workstation was a little more piece-meal for instructions, I couldn't find a nice checklist of what steps to take with the workstation (hence the instructions below). The administrative workstation took about a 1/2 hour, not counting software download times. A tip about permissions and usernames: Note: This page is also a check-list for staff, some day I'll break out that information. 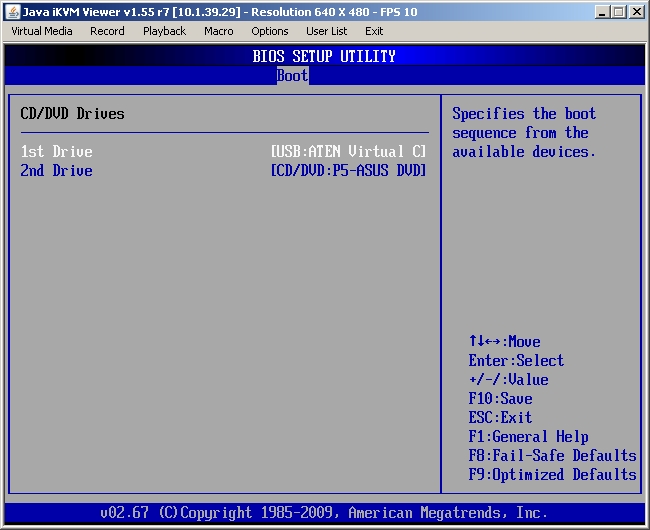 Set priority of Virtual CDROM (internal use)  Set Virtual CDROM 1st Boot Device (internal use) 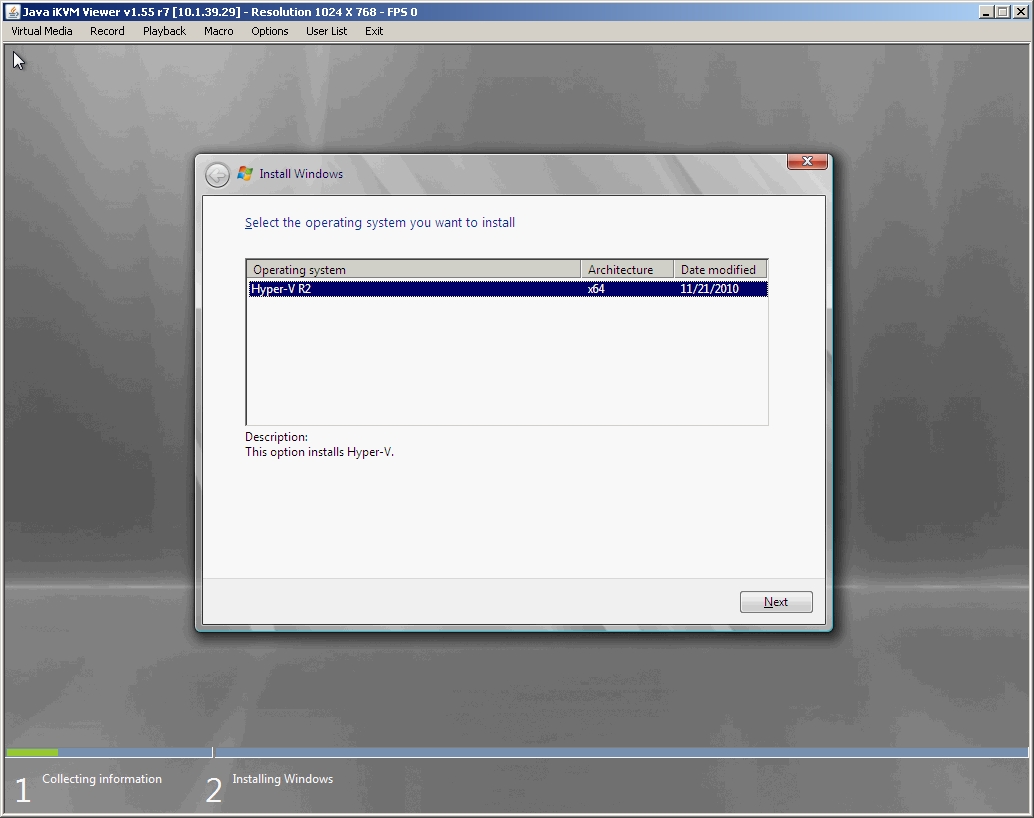 Pick Operating System 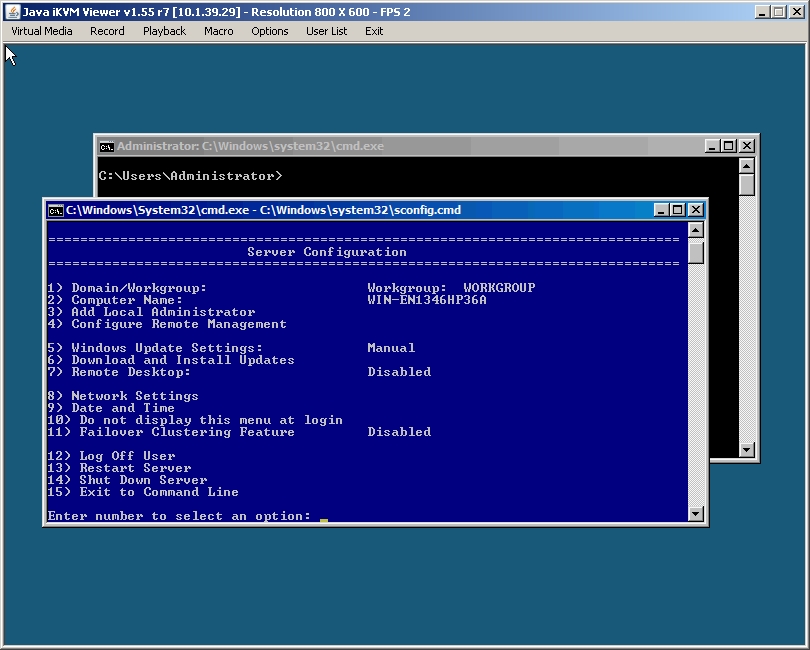 First Login Download .ISO file Setup - SuperMicro X8SIL-F (staff use) BIOS Changes
Advanced
  Boot Feature
    Quiet Boot [Disabled]
    Power Button Function
      [4 Seconds Override]
  Processor & Clock Options
    Intel(R) C-STATE tech [Disabled]
  Chipset Control
    Intel VT-d [Enabled]
  SATA/Floppy Configuration
    Configure SATA as [RAID]
    PCH Raid CodeBase [Intel]
  PCI/PnP Configuration
    Plug & Play O/S [Yes]
    Load Onboard LAN 1 Option Rom [Enabled]
      (when PXE Boot is desired)
  IPMI Configuration
    Set LAN Configuration
      (usually best to set static IP)
  BOOT
    CD/DVD Drive [USB:ATEN Virtual CDROM]
    Boot Device Priority
      1st Boot Device [USB:ATEN Virtual CDROM]
Install Hyper-V Server 2008 R2 SP1  First Use First Use Server Configuration utility
  Configure the options:
  2) Computer Name
     assign ComputerName: ServerV
     (your choice)
** Reboot **
  3) Add Local Administrator
     same Username/Password as login for Administrative
     Workstation (AW), for easy Remote Administration
  4) Configure Remote Management
     Choose options 1 thru 3
     1) Allow MMC Remote Mangement
     2) Enable Windows PowerShell
        (reboot)
     3) Allow Server Manager Remote Management
  5) Windows Update Settings8
     (skip for now)
  6) Download and Install Updates
     (skip for now)
  7) Remote Desktop:
     (E)nable
     2) Allow clients running any version of Remote Desktop
        (less secure)
Command window (black window) Change the command window properties (per normal) C:\>net share C-Drive=C:\ /GRANT:Administrators,FULL
--(interestingly, now ping to ServerV replies) Check and update Intel RAID Driver
C:\>\IntelUtil\RaidCfg32.exe /i | more
Version Tables:
Driver Version: 8.6.2.1014       <---- needs to be 10.0.0.1046
OROM   Version: 8.9.0.1023
App    Version: 10.0.0.1046
Version Check Failure: RaidCfg does not match driver
...... snip ......
--change to 64-bit drivers directory and use pnputil to install V10.0.0.1046 drivers. C:\>cd \IntelUtil\AHCI_Intel_10.0.0.1046_W7x64\Drivers\x64 C:\IntelUtil\AHCI_Intel_10.0.0.1046_W7x64\Drivers\x64>pnputil -i -a iaStor.inf Microsoft PnP Utility Processing inf : iaStor.inf Successfully installed the driver on a device on the system. Driver package added successfully. Published name : oem0.inf Total attempted: 1 Number successfully imported: 1 (pop-up box: confirm OK to install SW from Intel) C:\>\IntelUtil\RaidCfg32.exe /i | more Version Tables: Driver Version: 10.0.0.1046 OROM Version: 8.9.0.1023 App Version: 10.0.0.1046 ...... snip ......Configure tools to work from Administrative Workstation (AW) Get Device Manger working on AW, change Plug and Play Group Policy on ServerV from AW --On AW, command: MMC --File > Add/Remove Snap-ins... ----Add snap-ins: Computer Manger, Group Policy Object Editor, Hyper-V Manager, Windows Firewall With Advanced Security ----(add 4 snap-ins, for handy remote management of almost all tasks) ------For all snap-ins, choose "other computer" ServerV ----Reference with screen-shots: Remotely Manage Devices in Windows 2008 Server Core --File > Save As... (recommended to keep this custom MMC for ServerV) --ServerV Policy > Computer Configuration > Administrative Templates > System > Device Installation > Allow remote access to the Plug and Play interface: Enabled --(close and re-open Custom MMC to save policy change?) --On ServerV, command: gpupdate
Verify on AW that all snap-ins work: Clean-up tasks on ServerV
C:\>wmic.exe pagefile
AllocatedBaseSize  Caption          CurrentUsage  Description      InstallDate
              Name             PeakUsage  Status  TempPageFile
16375              C:\pagefile.sys  0             C:\pagefile.sys  2011103121433
7.590021-420  C:\pagefile.sys  0                  FALSE


C:\>wmic.exe pagefileset create name="S:\pagefile.sys"
Instance creation successful.

C:\>wmic.exe pagefileset where name="S:\\pagefile.sys" set InitialSize=
16384,MaximumSize=16384
Updating property(s) of '\\SERVERV\ROOT\CIMV2:Win32_PageFileSetting.Name="S:\\pa
gefile.sys"'
Property(s) update successful.

C:\>wmic.exe computersystem where name="%computername%" set AutomaticMa
nagedPagefile=False
Updating property(s) of '\\SERVERV\ROOT\CIMV2:Win32_ComputerSystem.Name="SERVERV
"'
Property(s) update successful.

C:\>wmic.exe pagefileset where name="C:\\pagefile.sys" delete
Deleting instance \\SERVERV\ROOT\CIMV2:Win32_PageFileSetting.Name="C:\\pagefile.
sys"
Instance deletion successful.

C:\>wmic.exe pagefile
AllocatedBaseSize  Caption          CurrentUsage  Description      InstallDate
              Name             PeakUsage  Status  TempPageFile
16375              C:\pagefile.sys  0             C:\pagefile.sys  2011103121433
7.590021-420  C:\pagefile.sys  0                  FALSE
After Reboot, verify pagefile is moved to S: drive Install Core Configurator (optional) Server ToDo List: References: The things that are better left unspoken:Ohman Automation Corp: Microsoft:
Remote Management with Server Manager
Hyper-V Remote Management Configuration Utility Configure Hyper-V Remote Management in seconds Workstation setup notes: C:\>cscript //H:CScript Microsoft (R) Windows Script Host Version 5.8 Copyright (C) Microsoft Corporation. All rights reserved. The default script host is now set to "cscript.exe". C:\>hvremote /AnonDCOM:grant Microsoft (R) Windows Script Host Version 5.8 Copyright (C) Microsoft Corporation. All rights reserved. Hyper-V Remote Management Configuration & Checkup Utility John Howard, Hyper-V Team, Microsoft Corporation. http://blogs.technet.com/jhoward Version 0.7 7th August 2009 INFO: Computername is WIN7PRO1 INFO: Computer is in workgroup WORKGROUP INFO: Current user is Win7Pro1\OACAdmin INFO: Assuming /mode:client as the Hyper-V role is not installed INFO: Build 7601.17514.amd64fre.win7sp1_rtm.101119-1850 INFO: Detected Windows 7/Windows Server 2008 R2 OS INFO: This appears to be a server SKU INFO: Obtaining current Machine Access Restriction... INFO: Examining security descriptor INFO Granted Remote DCOM Access to Anonymous Logon WARN: See documentation for security implications INFO: Are running the latest version C:\>hvremote /mmc:enable Microsoft (R) Windows Script Host Version 5.8 Copyright (C) Microsoft Corporation. All rights reserved. Hyper-V Remote Management Configuration & Checkup Utility John Howard, Hyper-V Team, Microsoft Corporation. http://blogs.technet.com/jhoward Version 0.7 7th August 2009 INFO: Computername is WIN7PRO1 INFO: Computer is in workgroup WORKGROUP INFO: Current user is Win7Pro1\OACAdmin INFO: Assuming /mode:client as the Hyper-V role is not installed INFO: Build 7601.17514.amd64fre.win7sp1_rtm.101119-1850 INFO: Detected Windows 7/Windows Server 2008 R2 OS INFO: This appears to be a server SKU INFO: MMC Firewall exception changes OK. INFO: Are running the latest version Command to open firewall so Disk Management snap-in will work from workstation: C:\Profiles\OACAdmin>netsh advfirewall firewall set rule group="Remote Volume Ma nagement" new enable=yes Updated 6 rule(s). Ok.(don't copy/paste from the psuedo-Command text shown here, there is an embedded <Enter> character in the word "Management"!)
- started the service and set to Auto startup: Windows Remote Management (WS-Management)
C:\>winrm set winrm/config/client @{TrustedHosts="<local>"}
Client
    NetworkDelayms = 5000
    URLPrefix = wsman
    AllowUnencrypted = false
    Auth
        Basic = true
        Digest = true
        Kerberos = true
        Negotiate = true
        Certificate = true
        CredSSP = false
    DefaultPorts
        HTTP = 5985
        HTTPS = 5986
    TrustedHosts =
Remote Administration Bliss!! 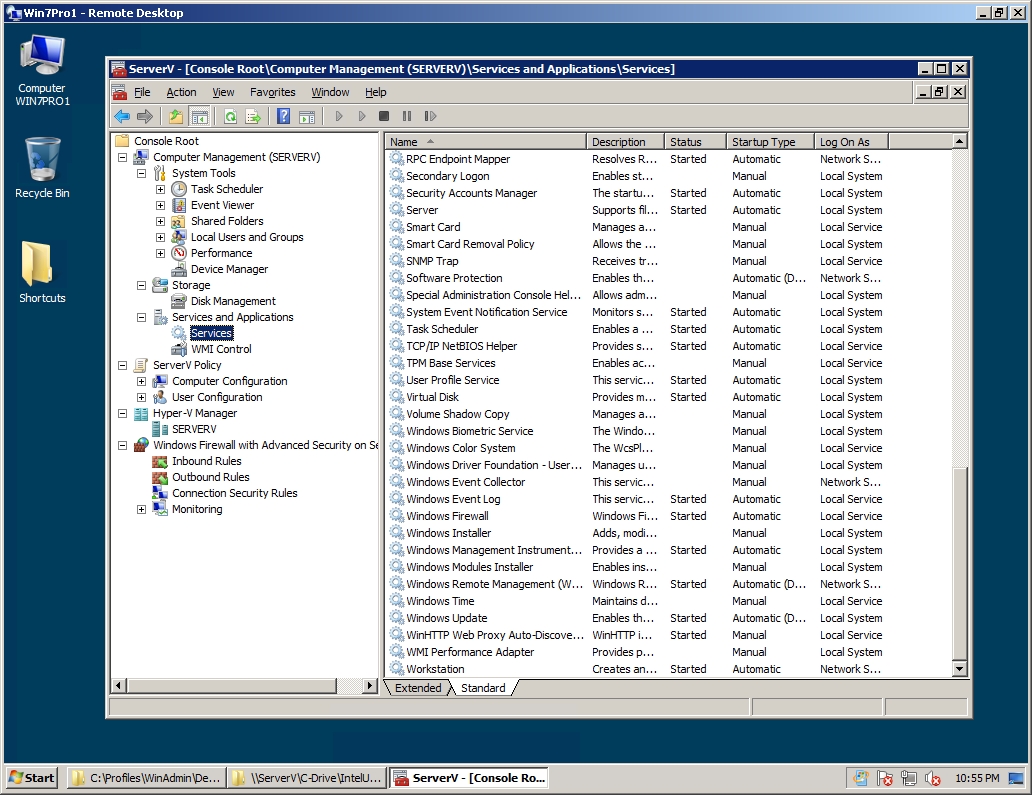 Custom MMC on Administrative Workstation Administering from another Windows Server 2008 R2 machine: |
||||||||
| Copyright © 1996-2026 Ohman Automation Corp. All rights reserved. | ||||||||